
General
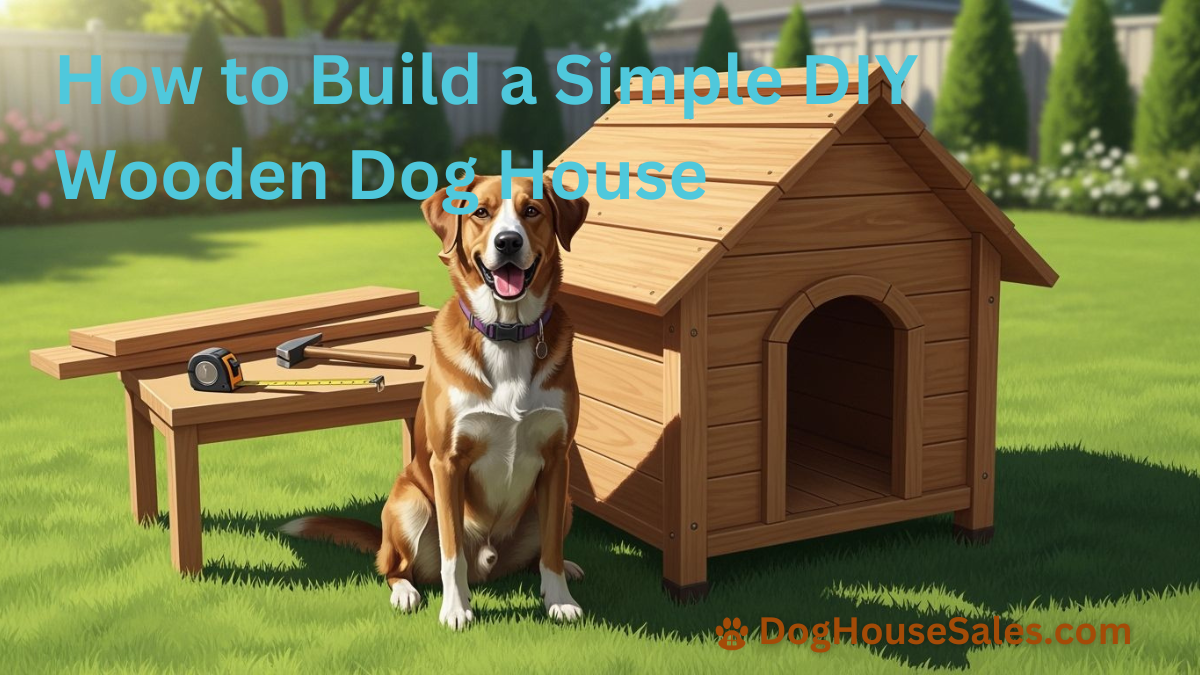
How to Build a Simple DIY Wooden Dog House
Sep
Building a custom wooden dog house is a rewarding weekend project. I love creating cozy spaces for my pet, and I know you will enjoy this project too. The basic process starts with assembling an insulated base platform to keep ground chill away. Next, I build sturdy, weather-resistant framing for the side walls. Finally, I add a simple pitched roof to shed rain effortlessly. You do not need expert carpentry skills to finish this project successfully. Simple hand tools and a little patience will get the job done right. Together, we will craft a safe, warm haven that your dog will cherish for years.
Planning to Build a Dog House: Materials and Tools
Collecting the correct supplies helps your building project run easily and smoothly. I always begin my planning step by writing down a clear list of main items. You must buy one 4-by-8-foot sheet of 3/4-inch plywood to create the outer walls. Grab two 2×4 pressure-treated boards that will form a strong floor base platform. Also, pick up a few 2×2 or 2×3 lumber pieces to construct your inner wall framing.
Required Supplies and Safety Gear
Staying safe keeps your DIY work fun from beginning to end. I always put on standard protective gear before I cut any boards or touch raw lumber. Wood dust can hurt your eyes and lungs, and rough pine edges often leave painful splinters.
| Safety Equipment | Key Rationale |
|---|---|
| Work Gloves | Protects hands from splinters and harsh chemicals |
| Safety Glasses | Shields eyes from debris and flying sawdust |
| NIOSH-approved Respirator | Prevents inhalation of fine wood dust |
Basic tools help you complete this build without any hassle. Make sure to get a circular saw, a jigsaw, an impact driver, and a measuring tape. Next, grab some 1 1/4-inch exterior deck screws along with a tube of silicone caulk. Having these simple items lets you assemble a tough shelter in no time.
Choosing Weather-Resistant Wood
Picking the right type of wood keeps your outdoor shelter strong for many years. Cedar naturally blocks rot, keeps bugs away, and stops water damage. You can also build this pet home using cheaper options, such as old pallet boards or extra fence pickets. To cover the roof, asphalt shingles or metal sheets will quickly shed heavy rain and winter snow.
Pressure-treated wood contains chemical preservatives that are not safe for pets to chew or ingest, so keep those boards restricted strictly to the outer base frame.
I prefer natural, untreated pine or cedar for the interior space. Using these solid materials keeps your pet safe from harmful chemicals. Finally, coat every outside wood panel with a safe, non-toxic sealer. A quality seal protects the whole house from tough weather all year long.
Sizing and Measuring Your Dog House
Measuring your pet correctly before cutting wood guarantees a cozy space. I always measure my dog while he stands comfortably in a normal posture. A proper shelter must give your pet enough room to stand up, turn around easily, and lie down.
I recommend taking three specific measurements using the standard A-B-C method to set minimum sizes:
- Measurement A (shoulder to chest): Door opening height equals A plus 3 inches.
- Measurement B (nose to flank, excluding tail): House width and depth must equal at least B.
- Measurement C (top of head to toes): Peak height equals 1.25 multiplied by C.
Sizing the Frame for Comfort
You can also use general industry standard additions for quick planning. I usually add 4 to 6 inches to my pet’s height and nose-to-tail length. For example, a Golden Retriever measuring 24 inches tall and 36 inches long needs a shelter at least 30 inches tall and 42 inches long. Small breeds need 4 extra inches, medium breeds need 5 inches, and large breeds need 6 inches or more.
Building an oversized frame might look nice, but large spaces trap less body heat. I keep the structure snug, especially during cold winter months. Extra space lets cold air drift inside easily. A tight wooden dog house keeps your pet warm all night long.
Laying Out the Doorway Opening
Designing the entry hole requires careful planning for easy access. I measure my pet at the widest point across the front shoulders first. The doorway opening must measure at least 1 inch wider than this shoulder measurement.
Next, I calculate the door height using the standing shoulder height. The entrance cutout should reach at least 75% of the front shoulder height. I draw this outline onto the front plywood sheet using a pencil. A quick check with a tape measure prevents costly cutting mistakes later.
Steps to How to Build a Dog House Base
Learning how to build a dog house base starts with creating a solid foundation. I always elevate the lower floor frame above the dirt. Setting pressure-treated wood directly on raw soil without proper protection causes severe moisture damage over time. I clear the targeted building site first and pack down a sturdy gravel bed to support smooth water drainage beneath the wood.
Assembling the Pressure-Treated Base
Building a tough wooden frame keeps ground dampness far away from the sleeping area. Pressure-treated lumber resists ground decay and repels hungry wood insects effectively. I follow a clear, sequential process to assemble this framing platform safely:
- Clear the ground spot completely and lay down a smooth layer of compacted gravel.
- Attach two rim joists to each end of a 36-inch rear ledger board using an impact drill and framing screws.
- Mark precise pencil lines 3.5 inches from each end of the rear ledger board.
- Mark a new pencil line 17.25 inches from one end of the ledger to locate the center joist.
- On the three 45-inch joists, draw pencil lines 24 inches from the ends to mark short side blocking locations.
- Fasten two joists directly at the 3.5-inch marks on the rear ledger using 3-inch wood screws.
- Secure the center joist onto the 17.25-inch mark with 3-inch wood screws.
- Connect the rim joists to the side joists using 2-inch front blocks and 3-inch wood screws.
- Insert internal blocking pieces at the 24-inch marks along the main joists to reinforce the structure.
- Attach two 26.5-inch posts near the front edge with 3-inch framing screws.
Alternatively, you can place pressure-treated 2×6 floor joists at 16-inch intervals on center directly over your prepared gravel base. Then nail matching pressure-treated 2×6 rim boards around the perimeter to enclose the entire frame. Either method creates a rigid platform that stays square and never sags under weight.
Securing the Plywood Subfloor
Now you must cover the open base frame with a flat subfloor. I use sturdy 3/4-inch plywood decking to construct a smooth floor surface. Thick exterior plywood spans across the joists cleanly without bending or sagging under pressure.
I set a 36×48-inch ACX floor panel directly over the completed base assembly. I align every outer corner carefully so the panel rests flush with the framing underneath. Small alignment gaps allow cold drafts to leak inside, so work patiently during this step.
Next, I take a straight ruler and trace the visible joist lines onto the top of the plywood sheet with a pencil. These clear guides show me exactly where to drive fasteners without missing the frame below.
Finally, I drive 1.625-inch framing screws along those marked lines into the frame using my cordless impact driver. Space your fasteners evenly along every joist line. You can also use 3-inch galvanized screws or nails if you construct your frame using thicker 2×6 boards. Sink every screw head slightly beneath the wood face so your pet never catches a paw. This finished floor platform protects your dog from severe ground cold and keeps the entire dog house completely dry during heavy rainstorms.
Framing and Sheathing the Wall Panels
I enjoy watching the frame come together after the floor base is ready. Building sturdy side panels makes a safe shelter for your pet. You can assemble these wall pieces flat on a table before attaching them to the floor.
Framing the Dog House Walls
I build simple frames using light lumber studs. Small dog houses do not need complex building methods. You can easily craft strong wall frames with accurate cuts and simple screws.
I follow these simple steps to build each side frame correctly:
- Attach one 15-inch vertical stud to each side of the wall board.
- Make sure each support piece sits flush with the plywood edge.
- Align the top support piece so it matches the top of the board.
After making the side walls, I construct the front and back sections. I leave a wide gap on the front panel for the entrance hole. I drive screws through the plywood into the studs to fasten everything securely.
Attaching Exterior Plywood Siding
Now you can attach outdoor siding to guard the frame against wind and rain. Wrapping your side walls with quality boards keeps the inside dry during severe storms. I take extra care during this step to maximize weather protection for my dog.
I use this tested method to attach the outer boards safely:
- Roll out water-resistant paper from the bottom up, overlap the edges slightly, and nail it down to stop drafts.
- Fasten the siding boards to the backing with stainless nails so the metal will not rust over time.
- Paint sealant onto the back side of each board before mounting to add extra protection against dampness.
- Cut the bottom edges at a sharp slant so rainwater drips off instead of soaking into the lumber.
- Clean the exterior surface, fill any tiny cracks with caulk, and apply a waterproof stain over all wood panels.
Building and Sealing a Sloped Roof
I enjoy making the roof because it turns an ordinary frame into a home. A slanted top quickly pushes rain away, keeping your pup completely dry and comfortable. I make sure to take my time getting all the cut angles correct when I reach this building step.
Trimming Rafters and Plywood Boards
I begin by finding the top rafter lengths using the total width of your frame. Dividing the frame width in half provides the exact side length for each roof beam. I pick a standard roof angle that rises 4 inches higher for every 12 inches of width. You can easily mark these angled cut lines on your boards using a square ruler.
- Lay a square ruler on your wood board, matching 4 inches on the short side to 12 inches on the long side.
- Trace a line down the short side to mark the top vertical cut for the rafter.
- Move the ruler along the board to copy this shape until you reach your full rafter size.
- Flip the ruler around at the bottom edge to draw a notch cut that sits firmly on the top wall board.
- Move the ruler outward to draw one last end line for a 6-inch overhang, then cut the board using your saw.
After trimming all the wood rafters, I put the roof frame together and secure the top plywood sheets. I apply a good coat of outdoor paint over the wood panels before putting on any shingles. Painting the plywood boards creates an extra barrier that stops water damage.
Adding Roof Shingles and Trim Pieces
Metal edges protect the bare sides of your plywood roof from heavy rain. I align the metal trim along the roof edge, beginning with the shorter side first. Then, I trim the metal where it meets the corners and nail it down tight with zinc-coated roofing nails. I place the trim over the top edge on flat roofs, but put it under shingles on slanted roofs.
Fill every small crack with reliable outdoor sealant to block tiny gaps where rain might enter and rot the wood.
Now you can lay down soft pine shingles or thick asphalt shingles over the covered roof boards. I draw straight ruler lines on the plywood to keep my shingle rows neat and even.
- Shift every second shingle down 1-1/4 inches from your mark so vertical gaps do not line up.
- Fasten each shingle using strong wood glue plus a few heavy staples along the top edge.
- Draw a neat 1-3/8 inch edge guide and trim away all the extra shingle pieces with your saw.
I make a top peak cover by holding two wood boards together at the exact roof angle. I angle the edges on a saw, join them with glue, and attach the cap over the peak with strong adhesive. To finish the build, I place small vent covers over 6-inch wall holes to stop damp air and rot. Finally, apply dark roof sealant over all metal corners and exposed nail tops to complete your project.
Sanding, Finishing, and Interior Bedding
I always smooth down all rough wooden edges before applying any final finishes. A quick sanding round removes dangerous splinters and creates a clean surface. Taking time during this step ensures your pet stays safe while stepping inside the new space.
Applying Pet-Safe Exterior Sealant
I select a non-toxic, pet-safe sealant to protect the exterior wood panels. This product forms a strong waterproof shield that prevents liquid seepage. Using an animal-safe formula stops moisture rot without exposing your pet to dangerous chemicals.
You should also choose a non-hazardous finish that has no strong odor. Heavy chemical fumes irritate sensitive animal noses inside tight spaces. Good sealants dry into a non-slip, smooth surface that feels gentle on paws. I brush two light coats on every outside wall for full yearly weather protection.
Adding Straw Bedding for Warmth
I use natural dry straw to line the floor once the exterior finish fully dries. Straw provides a simple, low-cost option with excellent heat retention. The loose stems trap warm body air and allow your dog to nest happily inside the frame.
| Bedding Material | Key Advantage | Key Disadvantage |
|---|---|---|
| Straw | Excellent heat retention, low cost | Needs frequent replacement, can become dusty |
| Cedar/pine shavings | Natural insect repellent | May cause irritation in sensitive dogs |
| Fleece blankets | Soft, machine-washable | Can hold moisture |
| Self-warming pads | Reflects body heat, no power needed | More expensive than straw |
I pack extra fresh straw into the house during cold winter months. Your dog can easily push out extra stems if the floor feels too full. However, your pet cannot add more bedding if the floor lacks proper padding. Avoid using hay, cloth, or cedar chips as primary winter bedding because these materials hold dampness and cause dangerous chills.
markdown
Simple regular care keeps your built home in great condition. Every spring, I check the top roofing pieces to spot small damage early. I also add fresh non-toxic sealer every year to shield the outer walls from rain.
Putting the house in a good spot keeps your pet cozy all year long. During warm summers, I suggest sliding the building into a raised, shady area. In freezing winters, place the shelter behind a fence to block strong winds.
Making a personalized pet home offers your dog a warm, secure shelter. Pick up your equipment today to start constructing a cozy place for your dog!
FAQ
How high should I raise the floor base above the ground?
I suggest setting your floor frame right on a packed gravel base. Lifting the bottom floor platform keeps ground wetness away and stops rot over time. Gravel lets rain drain quickly while keeping cold air off the lower subfloor.
Can I use cedar shavings instead of straw bedding?
Cedar shavings keep pests away, but small dust can hurt sensitive noses. I like dry straw better for chilly winter months because loose stems trap heat well without soaking up dampness.
How often should I apply exterior sealant?
I paint new pet-safe sealer onto the outer plywood boards every single year. Yearly coats keep up a tough water shield, stopping bad wood decay and keeping your shelter looking nice for a long time.
Is pressure-treated wood safe for my dog house?
You must keep treated boards only on the bottom floor frame. These treated pieces have chemical guards that sicken a pet if chewed. I always build top walls and inside areas using natural cedar or pine.
Related reading: How to Build Dog Houses: A Beginner’s Guide
