Buy Guide
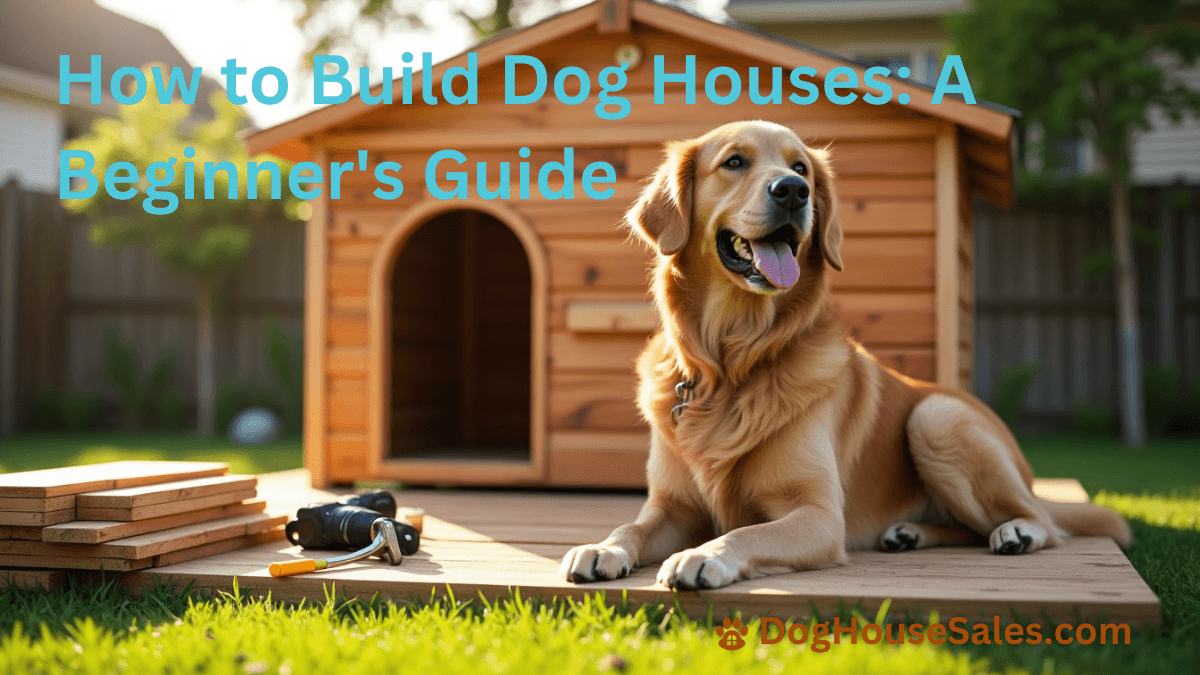
How to Build Dog Houses: A Beginner’s Guide
Mar
Dog houses do way more than provide simple shelter – they protect pets from extreme weather, dangerous heat waves and freezing winters.
Wooden dog houses might be traditional, but they are hard to clean and maintain. Composite plastic dog houses last longer and you can sanitize them easily. Your pet’s shelter needs to stand up against rain, snow, wind, and extreme temperatures.
This beginner’s guide will walk you through building the perfect dog house for your furry friend. You’ll learn everything from picking the right materials to adding significant safety features. The result will be a comfortable outdoor space your dog can call home.
Let’s start building!
Essential Tools and Materials for Dog House Construction
Building a dog house starts with the right tools and materials. Your furry friend needs a well-built shelter that’s both durable and safe.
Simple tools every beginner needs
You’ll need specific tools to build a dog house properly. Expert builders recommend a circular saw, jigsaw, drill with countersinking pilot hole bit, and measuring tape. You also need a hammer, utility knife, and safety gear like protective eyewear and hearing protection.
Choosing the right wood and hardware
The materials you pick will affect your dog house’s lifespan by a lot. Cedar, fir, and pine are your best choices for construction . Cedar works great as a natural insulator and keeps bacteria away . Pressure-treated lumber makes a solid base frame, but only use it where wood touches the ground.
Your hardware shopping list should include:
- Galvanized wood screws (1¼-inch, 2½-inch, and 3-inch sizes)
- Roofing nails
- Construction adhesive
- Silicone caulk
Optional materials for weather protection
A weather-proof dog house lasts longer. You might want to add:
- Roofing felt paper as a waterproof base
- Shingles to keep water out
- Exterior-grade paint or stain
- Thick foam insulation (up to 1½ inches)
On top of that, it helps to put tar paper under the shingles as another moisture barrier. A coat of exterior-grade paint creates a shield that makes your structure last longer.
Budget-friendly alternatives
You don’t need deep pockets to build a dog house. A simple structure costs under $100. Here are some money-saving tips:
- Use pallet wood for siding and flooring
- Pick water-based exterior stain (diluted 1:1 ratio)
- Try pavement sealer instead of pricey clear coats
Local scrap yards are great spots to find deals on metal siding and door parts. All the same, make sure everything you use is non-toxic and safe for your pet, whatever the source.
Keep your materials in a dry spot before you start building. Cut all pieces to size based on your design first to make the build smoother. Quality materials might cost more upfront but save money on repairs and replacements down the road.
Planning Your Dog House Size and Layout
Your dog’s comfort and safety depend on exact measurements and smart layout choices for their outdoor shelter. Expert-approved guidelines help you build a space that fits right and has good airflow to protect your pet throughout the year.
Measuring your dog correctly
You need three key measurements to size your dog’s house properly:
- Standing height from floor to head top
- Shoulder height from floor to shoulders
- Body length from nose to flank (excluding tail)
The house height should be 25% taller than your dog’s standing height but not more than 50% above it . The length should match or be a bit longer than your dog’s body length, though it shouldn’t exceed 25% of their measured length.
Size requirements for large dog houses
Different breeds need different sized houses based on their build. Large breeds like retrievers and collies need about 22″ x 39″ of floor space to sleep. Giant breeds such as Saint Bernards need bigger spaces – around 25″ x 43″ .
Your dog’s house should let them:
- Walk in easily
- Move around inside
- Lie down fully stretched
The right size helps your dog stay warm in winter as their body heat fills the space. A house that’s too big makes it hard to keep a comfortable temperature.
Creating proper ventilation
Good airflow is a vital part of keeping your dog’s house healthy inside. Quality ventilation helps:
- Clear out odors and dust
- Keep temperatures steady all year
- Lower humidity and moisture
- Stop bacteria from growing
Put vents near the roof peaks and leave the doorway partly open or covered with a loose flap to create good air movement. This setup lets air flow while keeping your dog protected from weather.
Door placement considerations
The entrance needs careful planning to give your dog comfort and protection. Make the door height at least 75% of your dog’s shoulder height. To cite an instance, see a dog with 19-inch shoulders – they need a door that’s at least 14 inches tall .
The door works best when you:
- Move it off-center to block wind
- Point it away from common wind directions
- Add an awning or porch to shield from weather
Make the door wider than your dog’s broadest part by at least an inch. Raising the floor a few inches off the ground helps control temperature better in summer and winter.
Note that some breeds don’t follow normal body proportions – you’ll find tall, lean dogs and short, stocky ones . That’s why your dog’s actual measurements matter more than general breed guidelines when sizing their house.
Step-by-Step Building Process
Building a sturdy dog house takes careful planning and attention to detail. You can complete this project in half a day to a few days with the right approach.
Preparing and cutting the base frame
Start with the pressure-treated base frame that creates an air space between the ground and floor for insulation. A medium-sized structure needs two pieces cut at 22½ inches and two at 23 inches. The 23-inch side pieces should fit inside the 22½-inch front and back pieces to form a rectangle. Secure all joints with 3-inch galvanized wood screws.
Cut a ¾-inch pressure-treated plywood floor panel to 26 inches by 22½ inches. The panel should be attached to the base with 1¼-inch galvanized screws while keeping all edges flush with the frame.
Assembling the walls
Wall assembly needs precise measurements to stay stable. The side walls need two 2x3x26-inch pieces set parallel to each other . Add three 2x3x15-inch pieces between them at both ends and center, then fasten everything with 3-inch screws.
The rear wall needs:
- Two 2x3x18-inch pieces
- One 11-inch piece
- Three 2x3x15-inch pieces
Your dog’s comfort determines the front wall’s entrance size. The door opening should be your dog’s shoulder width plus 3 inches. Make the door height about 75% of your pet’s shoulder height.
Installing the roof structure
Attach 13-inch roof framing pieces to the front and back panels’ inside edges . These pieces should sit halfway between the peak and bottom of the angled roofline . The roof panels go on next with even overhangs and tight peak joints .
Cover the roof with asphalt-impregnated roofing paper as your main moisture barrier . Metal drip edges should go around the perimeter before adding shingles . An upside-down starter course comes first with edges flush against the roof panel . Single tabs folded over the peak will cap the ridge .
Adding finishing touches
Weather protection is vital at this stage. Use silicone caulk on board joints to create weather-tight seals . Rigid foam insulation works well in wall cavities when covered with ¼-inch plywood to stop your dog from chewing.
Make it last longer by:
- Adding cedar trim around the door opening
- Using exterior-grade paint or stain
- Letting it dry for several days to get rid of fumes
The structure should sit several inches above ground on pressure-treated lumber to help control temperature. Make sure nail heads stay covered, especially on the roof, to keep your pet safe.
Weatherproofing and Insulation Techniques
A well-insulated and weatherproof design will turn a simple dog house into a year-round haven. You’ll need to know about seasonal needs and proven methods to protect against all types of weather.
Seasonal insulation strategies
You should create multiple protective layers throughout the structure to insulate properly. The first step is to install a vapor barrier between the floor and ground to stop moisture from seeping in. Then, put rigid foam insulation in wall cavities. You can use either 1½-inch-thick foam or combine 1-inch and ½-inch foam layers.
To prepare for winter:
- Cover insulation with ¼-inch plywood so your dog won’t nibble it
- Put foam insulation against the ceiling to keep heat in
- Use woven synthetic material to wrap the structure
The ceiling needs extra attention because heat naturally rises up. Your dog house won’t stay warm if heat escapes through the top. You’ll need to keep indoor temperatures between 50-79 degrees in really cold climates.
Waterproofing methods that last
Your weather-resistant shelter needs several protective layers. Start by covering the roof with tar paper, then install metal drip edges around the edges. Asphalt shingles give you the final waterproof barrier. Each row should overlap the previous one from bottom to top.
Here’s what you need to do for waterproofing:
- Apply roofing cement along top edges
- Install weather-resistant piano hinges
- Use short nails to avoid interior protrusion
- Cover the entire roof with protective tarps in winter
Corner braces are vital to keep the structure solid. Two plywood strips secured together will stop drafts and strengthen the frame. Cedar wood naturally fights off bacteria and fungi, which makes it perfect for lasting durability .
Elevated flooring benefits
A raised floor does much more than provide simple comfort. It keeps the structure off the ground, which improves insulation and drainage by a lot. You might want to put a platform, like a wooden pallet, under the structure to create air space.
Your elevated flooring system will give you:
- Better ventilation through improved airflow
- Proper drainage with slatted designs
- Less moisture buildup
- A barrier against ticks and gnats
This raised design allows 55% open filtration, which helps drainage while keeping the structure strong . Air flow underneath helps prevent bacteria and gets rid of odors. The elevation creates a barrier between your pet and ground temperatures, so they stay comfortable as seasons change.
You’ll get the best results by adding multiple insulation layers in the raised base. Put bubble wrap or foam sheets inside the pallet structure, and add another layer of insulation against the floor. This complete approach creates a cozy space that handles temperature changes while keeping good airflow and drainage.
Safety Features Every Dog House Needs
Building a safe dog house takes careful planning with the right materials, protection from predators, and proper safety features. A good design will keep your pet safe from dangers and give them a cozy place to live.
Non-toxic materials and finishes
Your dog’s safety depends on choosing the right pet-safe materials. ECOFLEX®, which combines recycled polymers and reclaimed wood fiber, will give a non-toxic option among other benefits like fighting moisture and odors. You can also use untreated lumber as a safe building material. Some treated woods contain chemicals that might harm your pet’s health.
For finishing touches, you should:
- Use enamel or epoxy paints to improve durability
- Apply water-based exterior stains (diluted 1:1)
- Pick non-toxic sealants for weatherproofing
Predator protection considerations
Your dog house needs smart design features to keep wildlife away. Custom-built kennels made since 2006 have shown they work against coyotes, bobcats, wolves, mountain lions, and snakes. You’ll want these protective features:
Wire bottoms stop animals from digging underneath, so dig trenches about 2 feet deep around the edges . Small-gage wire (no wider than 1/2 inch) is vital for smaller breeds to stop predators from reaching through gaps.
Preventing common hazards
Safety goes beyond just keeping predators out. You should check the structure often for sticking-out nails or screws that could hurt your pet. Good airflow helps prevent dangerous fumes from cleaning products or nearby chemicals.
Keep these household items away from dog houses:
- Insecticides and fertilizers that can cause tremors and seizures
- Antifreeze with ethylene glycol
- Mothballs containing paradichlorobenzene
- Batteries that might cause chemical burns
Hot or cold climate areas need carbon monoxide detectors near where dogs sleep . Put the structure in shaded spots away from direct sun to protect materials and keep temperatures comfortable .
To make your dog house last longer, lift the floor with pressure-treated lumber. This helps air flow and stops moisture buildup. On top of that, it helps to add a slanted, hinged roof that makes cleaning easier . Regular checks of all parts will keep everything safe and working well through all seasons.
Conclusion
Your dog’s house just needs careful planning and attention to detail. Anyone can create a lasting shelter for their furry friend with the right materials, precise measurements, and expert building techniques.
Safety is the life-blood of great dog house design. Your pet stays protected from environmental challenges when all elements work together – from weather-resistant materials to predator protection features. The right insulation and ventilation keep them comfortable all year, and elevated flooring shields them from moisture and ground threats.
Note that your project will succeed if you follow each step carefully. Use proper safety measures and check your finished structure regularly. A well-built dog house provides more than just shelter – it becomes your pet’s secure haven for years ahead.
Featured products

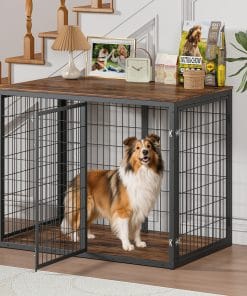
47” Dog Crate Furniture
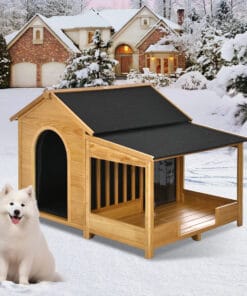
$159.2060.2″ Large Outdoor Dog House
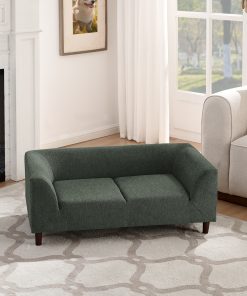
Original price was: $292.77.$290.57Current price is: $290.57.Dog Sofa With Backrest And Armrests
$136.07Soft And Comfortable Dog Sofa
$138.09